
There’s nothing quite like racing down a slope on a snowboard with new, razor-sharp edges. The chilly air blowing past you, your board’s instinctive, fluid movements, and the pure exhilaration you receive when going down the mountain produce a unique thrill that is difficult to match anyplace else.
You may notice that your snowboard is no longer as responsive as it once was. This means it’s time to have some snowboard sharpening and waxing done. Let’s take a look at why you should sharpen your snowboard’s edges on a regular basis and how to tune a snowboard below.
What Is the Purpose of Sharpening Your Edges?
If you’re new to snowboarding, you may not realize that your board needs to be tuned up every now and then. While the procedure isn’t difficult or costly, it is critical.
As a result, you should be aware of how to maintain your equipment in order to achieve the best potential results. While you can ride with dull edges, you’ll have a lot better time if they’re sharp.
Maintaining the sharpness of your snowboard’s edges is critical to the board’s performance as well as your safety. This is due to the fact that the edges of your snowboard assist you in carving clean turns, picking up speed, braking, and other vital snowboarding moves.
Unfortunately, all of your hard work can wear down or nick these edges every time you ride your board. If you run your fingertips over the edges of your snowboard and find them dull, rounded, burred, or if they have any visible scratches, they need to be sharpened.
Riding a board with dull or nicked edges can be difficult to manage, which might signal disaster for individuals who enjoy gliding down steeper slopes. You may also notice that turning or performing other actions takes more effort than usual.
It’s usually a good idea to keep the edges of your snowboard sharp so you don’t have any major issues down the road.
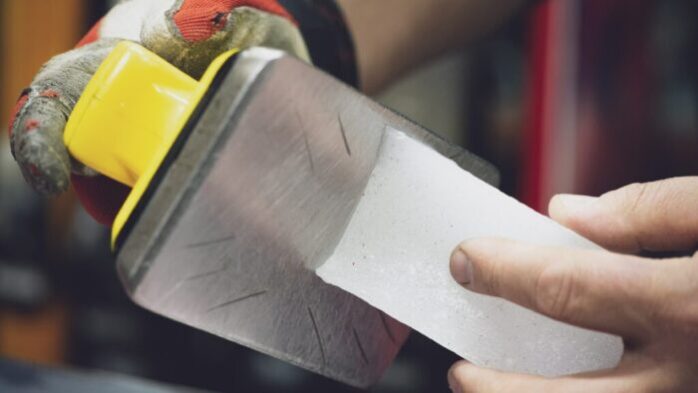
Sharpening Snowboard Edges at Home
The majority of people will start taking their dull or punctured snowboards to a snowboard repair business, but learning how to sharpen a snowboard can save you time and money (as well as quite a bit of money).
Sharpening a snowboard is not tough once you get the swing of it, but it takes time. Make sure you set out a day to sharpen those edges to perfection!
You’ll Need These Supplies and Tools
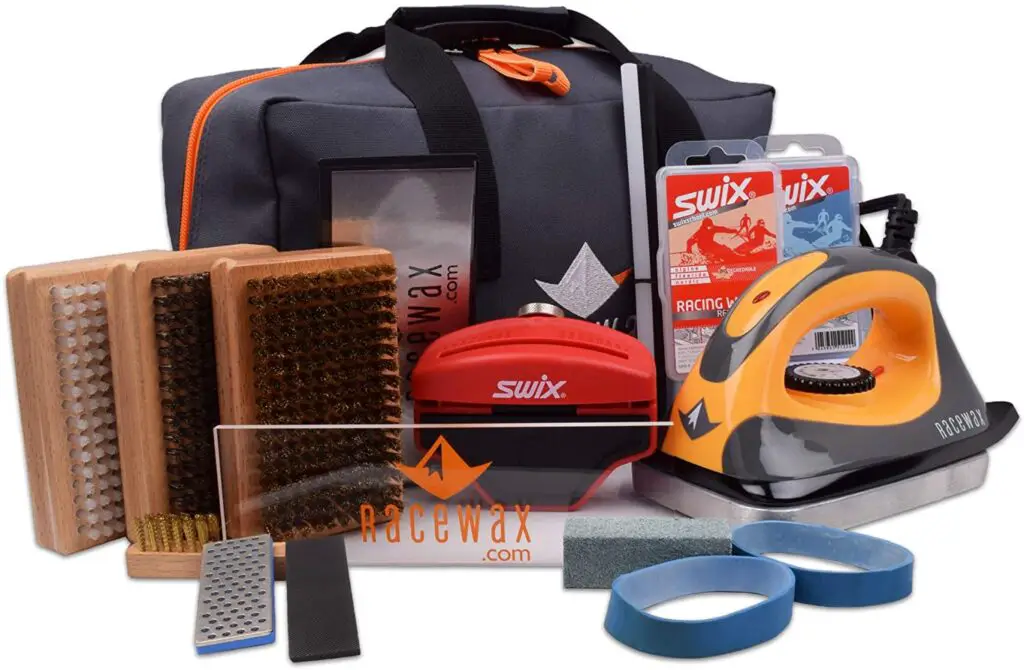
You may buy a dedicated snowboard sharpening kit, but they are very expensive.
An excellent snowboard edge tuner with a built-in guideline, a screwdriver, a nylon brush, wax, an iron, and a plastic scraper is all you’ll need.
While working, make sure your board is laid out on a sturdy surface that would be about 1/2 to 3/4 the length of your board.
Due to the mess that the shaved edges and wax will make, it’s also a smart option to sharpen and wax your board in a garage or garden. Before waxing the base of your snowboard, you must always take care of the edges. This prevents the metal filings from embedding themselves in the base and causing irreversible harm.
Steps for Snowboard Sharpening
Find the Right Location
You only need to sharpen the parts where your board contacts the ground if you have a standard camber board. This is to prevent any sharp edges from cutting you while you shred down the mountain.
If you’re concerned about nicks or rough patches on your board while out riding, have a sharpening stone in your pocket to buff them out. For some types of snowboarding, sharpening stones can also dull your board’s edges. For simple edge repairs, a coarse grit diamond stone is the ideal solution.
This stone reduces the damage so you can file the remainder of it away. After that, you can use a fine stone to polish the surface and tighten the edges.
Use the diamond stone if you just need a fast tune-up while out riding. This removes any curled burrs that may have formed while side-tuning the base with another stone, such as an Arkansas stone or a ceramic stone.
Ensure that your stone is passed along the base edge, very lightly along the bevel, and not on the bevel itself.
Keep in mind that the ends of your board should never be sharpened. It’ll render your snowboard almost useless. In fact, the ends are frequently de-tuned on purpose to avoid twitchiness while riding.
Bindings must be Removed
The first step is to remove your bindings or, at the very least, release the screws that secure your bindings to your board.
This is because these screws can suck debris into the base of your board, making it lumpy. It’s easier to wax a snowboard when it’s nice and flat, so take care.
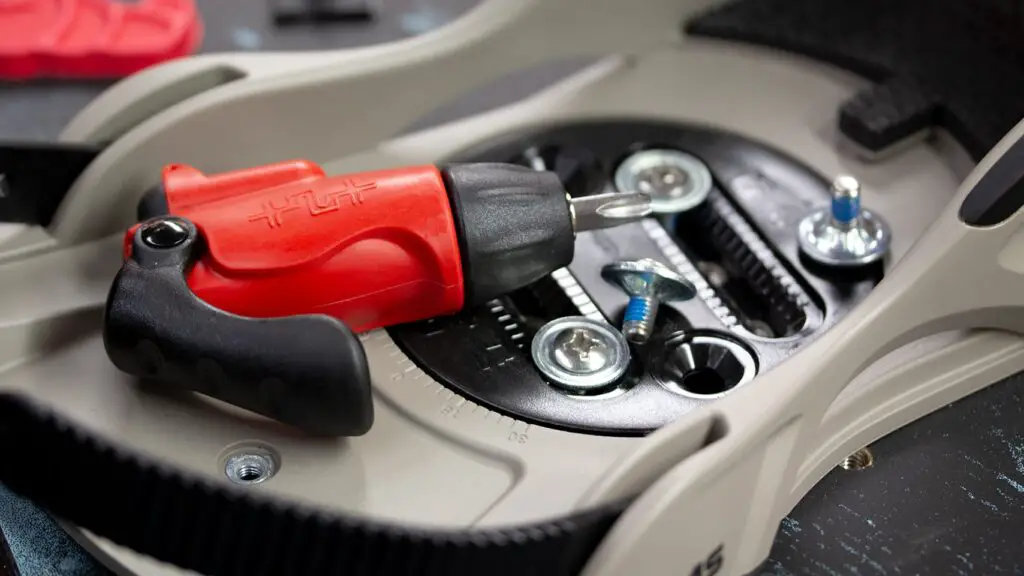
Ensure your Edge Sharpener is at the Right Angle
After that, you’ll need to change the angle of your snowboard edge tuner to the proper setting. The normal angle for novice and intermediate riders’ boards is 90 degrees.
89, 88, and 87 degrees, on the other hand, are best suited to more advanced riders, with each degree serving as a marker of skill growth. To put it another way, an 87-degree angle cut is reserved for advanced snowboarders.
In general, the steeper the angle, the more bite the board has, which is ideal for hard-packed snow or competitive snowboard races.
File The Board
Rather than sawing back and forth, you should ideally file your edges in one direction.
This is to prevent future nicking of your board, as well as the fact that most edge tuners only sharpen in one direction. Your sharpener should include some sort of indicator that tells you which way it should be pointed.
Before you begin filing, you should run a marker around the board’s edges. This will assist you to remember where to file and how much of an edge you still have to sharpen.
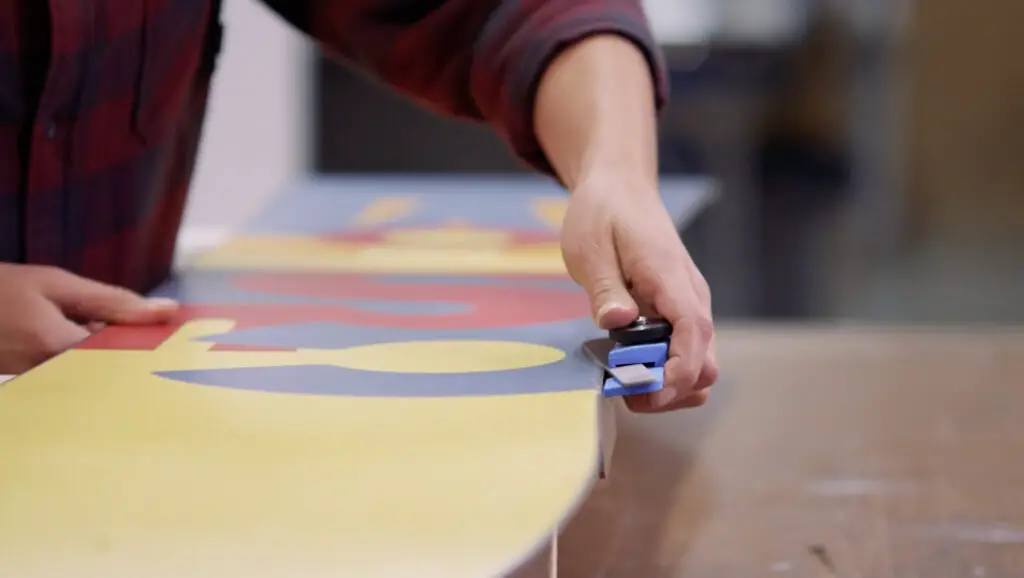
Step 1: Begin on the board’s base edge. Make sure your sharpener is directed from the nose to the tail of the board. The guide should be positioned flush against the side edge and the base should be flat.
Step 2: Apply gentle pressure to the file on the base edge of your board. After that, slowly pull it along the edge’s length. Your strokes should all be traveling in the same direction and overlap.
They should also start and terminate at the wide places near the nose and tail of the board, right before it curves up. Continue filling until the line you created with your marker earlier is no longer visible. Then you can move on to the next base edge.
Step 3: Switch your tuner around to the side-edge position once both base edges have been sharpened. You may be able to choose the exact angle that crosses on its corner depending on the type of sharpener you have. With your marker, draw another thick line along this edge. Start at the broader spot near the nose and work your way to the opposite wide point near the tail. Always keep your file flush against the board and follow the lines you’ve drawn around the edges.
Step 4: If you see any sticking points, including a burr or nick across any of the edges, use a decent sharpening stone to go over these areas several times. Once you can run the file effortlessly all the way down with only very mild pressure, you’re done.
Base edge tune-ups should be maintained to a bare minimum, and you should use the least amount of pressure possible when sharpening them. Side edge tune-ups, on the other hand, should be done on a regular basis, particularly if you snowboard frequently.
Files are often exclusively used to create new or more acute bevel angles. Just be careful not to file those edges too aggressively! If you get too aggressive with your filing, you won’t be able to go back to a wider angle, and will instead have to commit to a board with more bite than you may desire or anticipate.
If you truly want to restore your board back to its original angle, you’ll probably need an aggressive base grind, a sidewall cut, or possibly both.
Although you should never sharpen your board’s nose or tail, a fine gummi stone can be used to complete the nose and tail. It should be applied with a few medium-pressure strokes at a 45-degree angle.
Check the Sharpness
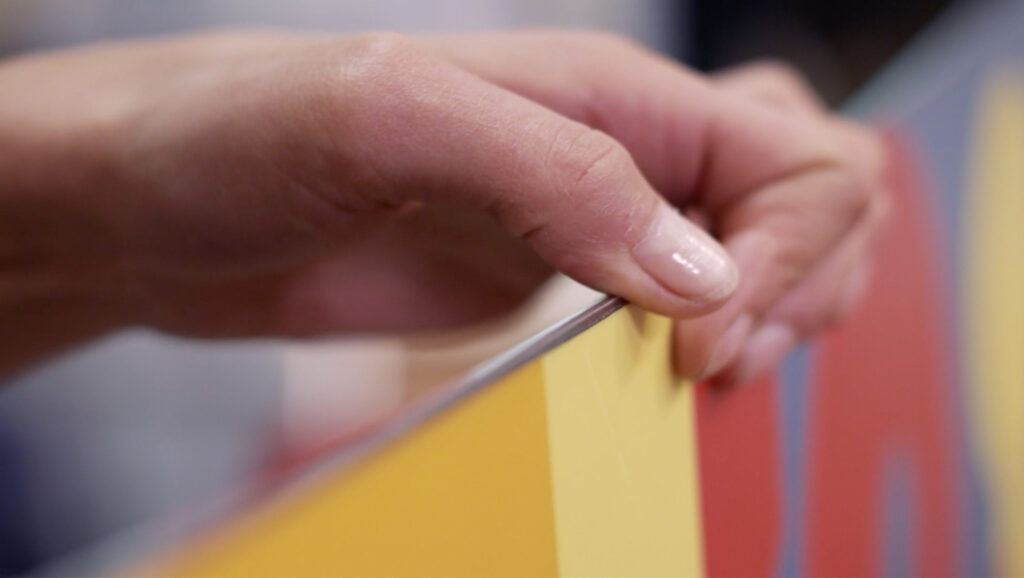
Gently rub a fingernail down the board’s edges to see if it’s sharp enough. Your edges are as sharp as they need to be if your nail peels or chunks of it start to scrape off without any effort!
Make sure you examine each edge you’ve sharpened as you go to ensure you’re happy with the sharpness before filing too severely.
Use a gummy stone to remove any burrs you may have created throughout the tuning process. Rub the stone down the length of the board with very mild pressure once more.
Scrub each edge you sharpened with an edge rubber if you have one. The rubber will polish your edges, eliminate any ugly rust, even out any remaining irregularities, and may even increase your board’s performance.
Wax The Base
Make sure your foundation is fully clean and free of any nicks or debris before waxing it. If you’re still concerned about something you could have missed during tuning, use your nylon brush to scrub over the base.
Remove any extra wax or dirt with four or five firm strokes in each area. Because this can leave some dust on the board, make sure to wash it down with a scotch pad once you’re finished.
Most wax containers include a suggested melting temperature, which is especially useful if you have a special iron with a temperature gauge built-in. However, if you only have a regular clothing iron, simply set it to a low setting. The wax should be melted until it starts to drip slightly.
Step 1: Take your wax and move it around the board while pressing it to the iron. Draw a line of wax around the board’s edge. This is the area that requires the most waxing.
Step 2: Then, in an “S” shape, drip the wax to fill the center of the board. Fill in any significant gaps by passing them across the middle of the board once again.
Step 3: Before going on to the next area, go over each one in small, concentrated circles. Keep in mind that concentrating on one location for too long can cause your snowboard to melt or become permanently damaged. If the wax in one location remains moist for more than a few seconds after you leave it, you’ve spread too much wax in that region. Attempt to be as active as possible.
Overall, keep the waxing session moving along quickly, and don’t overdo it! Scraping away superfluous wax in a later tune-up will be tiresome.
How Often Should You Sharpen Snowboard Edges?
This is dependent on how frequently you snowboard. Most individuals only need to tune their snowboard once a year after the winter season, but if you ride frequently all year, you may need to sharpen your snowboard edge at least once a week.
In general, you can tell by how the board feels. It’s time for a maintenance session if it’s stiff and turning requires more effort.
Final Words
It’s satisfying to know how to sharpen snowboard edges. Riding downhill on a freshly sharpened board and instantly noticing the difference in performance gives you a feeling of accomplishment.
After the strain of riding a duller snowboard, riding a freshly tuned one is a welcome contrast.
A sharp-edged board will not only respond more quickly to your moves but will also increase your riding skills and keep you safer.
You’ll have a much better ride now that you learned how to sharpen snowboard edges.


